
Troubleshooting of welds and other welding problems increases costs in welding, causes delays and affects weld quality. Even a moderate understanding of welding problems, their symptoms, causes and potential solutions can help tremendously. The more informed you are the better.
To successfully troubleshoot and fix welding discontinuities, welding defects and other welding problems we need three things: Knowledge of welding theory, experience solving welding problems and a systematic approach to troubleshooting.
The ability to troubleshoot welding problems depends heavily on your knowledge of welding processes (theory) and your experience fixing problems. Of course, we don’t work alone, so we always recruit as much help as there is available. A third key factor is to follow a systematic approach to troubleshooting. Rather than using trial and error to correct an issue, it is vital to understand the root cause to prevent the problem from happening again. Let’s examine these three key areas.
Knowledge
Your knowledge of welding process theory, more specifically, your knowledge of the effects of welding variables is absolutely essential. This knowledge will help you identify potential causes for many welding problems as well as identify solutions.
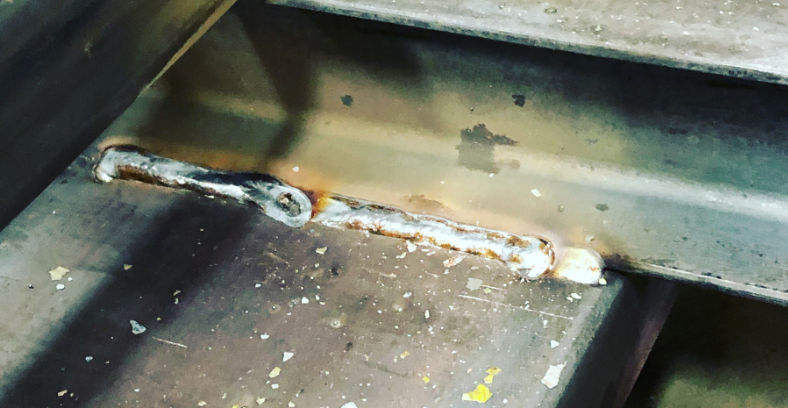
A simple example would be experiencing ropey fillet welds. By ropey we mean welds with excessive convexity (crowns). If we know that voltage helps with wetting of the weld we can immediately turn our voltage up to correct the issue. That’s one part of it, we corrected the problem, but we must also understand why the weld changed if we did not change our welding procedure. In other words, why did we have a voltage drop. This is where experience comes in.
Experience
Solving a problem the first time may take a long time. The second time it may only take a couple of minutes. This is because once we have experienced a problem, we learn from it. To continue with the example above. Increasing voltage allowed us to once again have a good weld. But what caused the voltage to drop in the first place? If we don’t treat the underlying problem we may have another problem later on. From experience we know that if a welder has not changed welding parameters, drops in arc voltage may be due to:
- Loose work connections
- Improperly sized welding cables
- Poor work clamp connection/practices
- Connecting work clamp over paint, rust, mill scale and other non-conductive contaminants
- Overheating of welding power source
- Input power fluctuations
- and many more
Knowing all this will help us identify the root cause or causes and immediately take corrective action to eliminate the problem and prevent it from happening again.
In the example above, if the problem was caused by a progressively worsening voltage drop due to a poor work connection, increasing the voltage will help initially. But when the system cools down (say after a break or the morning of the next day) the voltage will be too high since it was turned up earlier, thus causing other issues like undercut, burnback to the tip, excessively wide weld bead, excessive concavity and other.
The final solution may be to fix or replace the work cable and/or clamp. It may just require tightening the connection. It may require a different clamp that provides better contact with the work piece.

A systematic approach to troubleshooting welding problems
Troubleshooting should not be trial and error. This takes too long and often doesn’t find the root cause. We must follow a systematic approach to arrive at the root cause or root causes.
There are 7 steps to troubleshooting problems:
- Gather information
- Describe the problem
- Determine the most probable cause
- Create a plan of action and test a solution
- Implement the solution
- Analyze the results
- Document the process
Unfortunately, when welding problems are being evaluated we typically jump straight to implementing a solution (trial and error), without first truly understanding the problem. Gathering information is a critical step and perhaps the most important.
Here are some of the questions you should ask to gather information any time you face a welding problem:
>> Has anything changed (consider everything)?
- Filler metal brand or diameter
- Shielding gas
- Base metal condition or type
- Fit up (or other changes in upstream operations)
- Welding equipment
- Welder (different welder skill levels)
- Ambient conditions (temperature, humidity, wind conditions)
- Welding parameters (amperage, voltage, travel speed, welding angles, CTTWD, preheat temperature, PWHT, etc.
- Location of welding machine
- Amount of welding done during the day (increases or decreases in operator factor)
- Condition of work and welding cables (Any recent damage? Any recent upgrades? Changes to work camps? etc.)
- The list goes on and on…
>> Has this problem occurred in the past? Was it ever fixed? If so, how?
>> What changes, if any, has the welder made to correct the issue? What has been the result of such changes?
Providing your welders, supervisors and even welding engineers with a comprehensive troubleshooting guide is essential. We spend a lot of time helping our customers troubleshoot problems and have found that proper training in this area can save companies thousands of dollars in lost productivity. It can truly be a game changer.
In the coming weeks we will be providing more information in troubleshooting some of the most common welding problems using the approach described in this article.
Are you tasked with developing, qualifying and approving welding procedures? Are you in need for procedures that adhere to AWS D1.1 Structural Welding Code – Steel? If so, the use of prequalified Welding Procedure Specifications will help you save time and money. It will also help with quality and consistency. Qualification testing for a single welding procedure can cost over $1,000 depending on the necessary tests. Prequalified WPSs are exempt from testing and ready to use.
