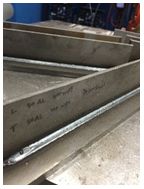
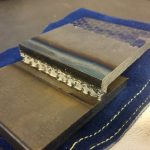
Codes detail the requirements for performance qualifications of welders, welding operators and tack welders. Many codes do not demand that a Certified Welding Inspector (CWI) or a welding engineer conduct the necessary testing. Unless your customer specifically asks that a CWI or third-party do this, you can simply follow the code yourself to perform all testing. This, however, must be done by a competent professional that understands the code. We would highly encourage any fabricator to have a CWI on staff, or at the very least, have someone trained in visual inspection. Experience in the code being used would also be helpful.
Many customers call us to ask how they can get their welders qualified. It is important to first understand what qualification they need. Typically, this is their customer’s requirement and should be specific to the materials, processes and positions to be used in production. The actual evaluation of the tests specimens consists of just a few tests. These tests are:
- Visual Inspection (VT)
- Bend Test (face, root, side)
- Macroetch Test
- Fillet Weld Break Test
- Radiographic Test (RT) – can be done in lieu of bend tests
For the vast majority of cases you will only need to perform visual inspection and a fillet break test (for fillet welds) or bend tests (for groove welds). These tests and examinations are easily done and need not cost a lot of money. With a band saw, etchant solutions, a grinder and a bend test jig you will be able to perform 90% or more of the tests required to qualify your welders.
A very important aspect of qualification, whether it is for welding procedures or welders, is documentation. You must document everything. Although pictures are not required we recommend keeping pictures on file. With the ease of electronic filing this should be a no-brainer.
AWS D1.1 Guide to Qualification of Welders and Welding Procedures
Welder qualifications should be part of every quality control program, whether required by a customer or not. If you are not required to qualify welders we highly encourage you to do so. You don’t necessarily need to comply with the requirements of a specific code. You can develop your own quality standard and your own testing methods. But it is important that it gets done and documented.
Following is a brief description of the tests involved in qualifying welders per several codes including AWS D1.1, D1.2 and D1.6.
Visual Inspection (VT)
Visual inspection is the first step during performance qualifications. Specific instruction can be found in Section 4.9 – Methods of Testing and Acceptance Criteria for WPS Qualifications (same applies to performance qualification). After a fillet weld or groove weld is made, visual examination looks for weld discontinuities such as cracks, craters, excessive reinforcement, weld size, undercut and others. No sense is performing destructive testing if performance fails initial visual inspection of the weld.
Bend Test
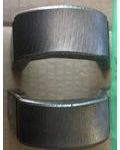 Bend tests are specific to groove welds. They can be side, root or face bends. This type of testing is ensuring soundness of the weld. The goal is to have no discontinuities on the bent surface, although the code does have an allowance for some discontinuities. After the parts are bent, visual inspection is performed and all discontinuities are measure and then compared to maximum allowed values.
Macroetch Test
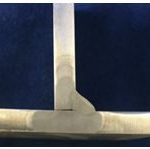 A macroetch test is done to evaluate if the welder achieved fusion to the root of the joint as well as the side walls. This is only required on fillet welds as bend tests would reveal any problems associated with lack of fusion on groove welds. The macroetch can be measured so we know other important values such as depth of penetration at the root and sides. AWS D1.1 requires fusion to the root but not necessarily beyond. This is a useful test, but has one important limitation: you are evaluating fusion and penetration at one specific spot only. Cut the part an eighth of an inch to either side and you may have different results. To compensate for this, fillet break tests are performed.
Fillet Break Test
In a fillet break test, a section of the joint is cut out, usually about 4-6 inches in length. The specimen is then placed on a vise or a press and the root of the joint is placed under tension until the part breaks or folds over itself. The break is then examined to assured that there was fusion to the root.
Radiographic Test (RT)
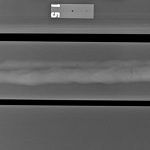 Radiographic testing uses X-ray or gamma rays to project an image of the weldment onto a radiographic film. When the film is exposed to the radiation source, the parts of the weld that have the highest density will appear the lightest in the film. Discontinuities in the weld will show up as darker areas since the voids, slag inclusions, cracks, porosity and lack of fusion are areas of lower density. Tungsten inclusions, which can happen when using GTAW, will show us as very bright spots due to the high density of tungsten.
Regardless of what test you are performing, the presence of discontinuities does not mean failure. Codes and standards may have allowances for the amount of weld discontinuities present. AWS D1.1 is a perfect example of this.

