We all have probably heard about destructive testing in welding. After all, those of us who are certified welders or work at a place that needs to certify welding procedures, have at one time or another heard about a bend test, or a charpy v-notch test. However, there are several types of non-destructive testing available. As you can imagine, performing destructive testing on finished products isn’t good for the bottom line. Sometimes even sampling just a few finished products would represent a huge expense. Fortunately there are several non-destructive inspection methods. Some of these tests require equipment and some require a high degree of specialization by the inspector. Below are the main non-destructive inspection methods.
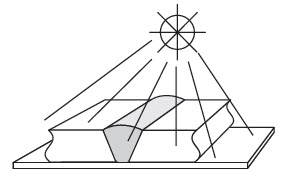
VISUAL: Looks for surface defects such as porosity, cracks, craters, and slag inclusions. Visual inspection also looks for other issues that may not necessarily affect the integrity of the weld, but could be costing the company money or could lead to a weld defect. These are under welding, over welding, warping of parts (taking them out of tolerance), undercutting and improper fit up. Visual inspection is the most widely used kind of non-destructive testing due to its low cost and can be done during and after welding is done. The downside to using visual as the only inspection method is that we can only detect surface defects. Items like internal porosity, internal cracks or lack of fusion cannot be detected.
RADIOGRAPHIC: This method can detect microscopic internal flaws such as cracks, porosity, blowholes, non-metallic inclusions, incomplete root penetration and undercutting. When x-ray film is created customers have a permanent test record which can be used for traceability. Testing equipment can cost several thousand dollars. However, for companies in need of testing all finished assemblies and not just procedure qualification test pieces it is a relatively inexpensive method. This method requires skill on the part of the inspector in determining the right angles to shoot the x-ray and also interpreting the film.
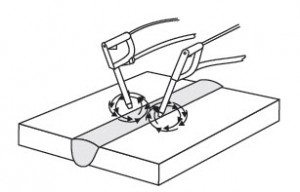
MAGNETIC PARTICLE: Very good at detecting surface discontinuities such as crack. This method uses specialized equipment and supplies such as magnetic powders. It is easier to use than radiographic testing and lower cost, but as with visual it only detects surface discontinuities. However, it will detect cracks that are sometimes impossible to see with the naked eye. It also requires a high degree of skill by the inspector.
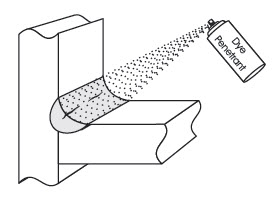
LIQUID PENETRANT: This method requires the use of fluorescent or dye penetrants and developers. It detects surface cracks that cannot be seen with the naked eye. This method is used for leak detection and it is especially advantageous when it is not economically feasible to fill and assembly with water or gas to test for leaks. A benefit over magnetic particle is that it can be used on non-magnetic materials such as aluminum. This testing process is low cost and easy to carry out.
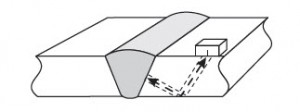
ULTRASONIC: Requires specialized equipment. This method detects both surface and sub-surface flaws which are not detected by other methods. UT testing is very useful when you are testing assemblies that are not suitable for x-ray equipment. It does require a very high level of skill to interpret readings and it does not create a permanent record like radiographic provides.


Hi there , Just wondered if there is a standard to work to in testing methods mentioned ? for instance if `Ultra sonic` is requested can we offer say die Pen as alternative ? Knowing of course that `Die-Pen` is not as in depth as `Ultra sonic` So is there a Standard that these relate to Pls ???
Yes. You must always refer to contract documents. They will always specify testing methods and potential alternatives. More often than not, the requirements will be from a specific welding code. Codes like AWS D1.1 detail which testing is required and if there are alternatives. For example, you may be able to perform ultrasonic testing in lie of bends for procedure and/or welder performance qualification.
Nice Post! The different methods of non-destructive inspection in the post will help me choose the best method for my testing project. Keep sharing such valuable information.
Thank you! I appreciate your comment.
I found it very interesting to know that there is a variety of non-destructive testing methods. My husband and I will be starting a business soon and I want to know about all the needed things for the job. I will will definitely consider that option once we’ve already started our business.
Good luck Megan! Let us know if we can help in any way.
My brother requires a non-destructive testing service, but I was unsure which method will work for his project. This article gives me a good understanding of NDT Methods. Thanks for the useful information.
Explain testing methods of weld both destructive and nondestractive
Please read: 5 Methods of Nondestructive Testing
THANKS FOR THIS KIND OF WELDING HELPING WEBSITES
How become a good surveyor and ndt inspector please keep on suggesting