
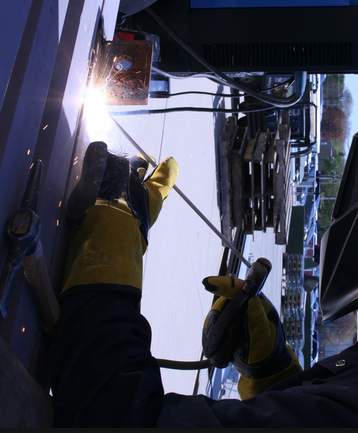
Stick welding can be a challenge for novice welders because of the constant need for adjustment caused by the shortening of the electrode as it is consumed. Go out of position and all hell may break loose. For those of us that are experienced welders a 3F or 3G vertical up with SMAW can still be challenging. E6010 and E6011 electrodes add yet another challenge, compared to E7018, due to the harshness of the arc and whip technique employed. Below are a few tips on how to make your vertical up welds less challenging.
A quick note: the main difference between an E6010 and an E6011 is that the E6010 is designed specifically for DC+ current while the E6011 will run “well” on AC. Unless you are stuck with an AC-only welder use E6010. There is caveat to this recommendation: If you are experiencing arc blow toward the end of the weld AC current will alleviate this problem.
The current you need depends on the size of rod you are using. Follow the manufacturer’s procedure recommendations. For a 1/8 6010 or 6011 use 80-90 amps. We prefer close to 90 to get a flatter bead. Don’t increase your current too much due to the potential for undercut. Also, higher currents will lead to more spatter.
Technique:
Use a whipping technique in the first past. No weaving. The first pass will tend to be a bit ropey. Increase your current if necessary, but don’t worry if it’s not perfectly flat. You can fix this by running a weave in the second and third passes. A box weave will flatten the weld in the second pass because you will dwell longer at the sides, thus filling the toes nicely. The last pass can be a straight weave.
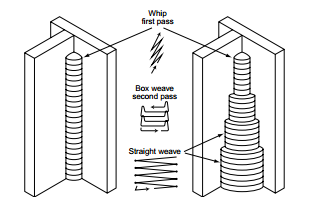
Keep in mind that although it is common practice to whip a 6010 or 6011 you don’t always have to do this. Some welders will run the inverted “T” weave. This combines whip action with a straight weave. The purpose of whipping is to allow the puddle to cool and solidify quickly.
IMPORTANT SIDE NOTE: Never whip an E7018 – you will introduce hydrogen into the weld.
Other tips:
- Always get comfortable before starting your weld. Experienced welders can free-hand this type of weld, but when available they will brace themselves. This can be as easy as leaning on a table, fixture or the part itself.
- In short welds, or if you are preparing to run your 3F or 3G test, do a dry run. Run up and down the joint (without arcing) and make sure you can go the entire length without drastically changing your work and travel angles.
- If the power source has an arc force feature use it to your advantage. This feature will increase energy to the arc and prevent sticking. It also allows you to drive the stick into a the joint without losing your arc. This is great on open root pipe. The higher the setting the more forceful the arc will be.
If you have any other tips please share on the comments section.