The ability to write and/or interpret welding symbols is essential for many welding industry professionals including welders, supervisors, CWIs, welding engineers, estimators, QC personnel and more. Yet, less than 5% of the customers we consult with have at least a basic understanding of welding symbols.
Welding symbols communicate vital information to the welder. It allows estimators to identify the amount of weld metal needed and to estimate welding costs (materials and labor). It allows an inspector to know what kind of inspection is necessary and for which welds. They allow a supervisor to check weld sizes against prints to ensure there is no costly overwelding in the shop.
The most common types of welds are fillet welds and groove welds. These two types comprise 95% of the welding that is done and thus are the most important ones to learn. Today, we will do an introduction to groove welds.
The following article is an excerpt from the Welding Symbols Training Manual.
Types of Groove Welds
There are eight types of groove welds. Groove welding symbols can contain a large amount of information as it can specify depth of groove, weld size, length of weld and many other important things. However, there is consistency in how all this information is shown which makes it relatively easy to comprehend the diverse types of groove welding symbols.
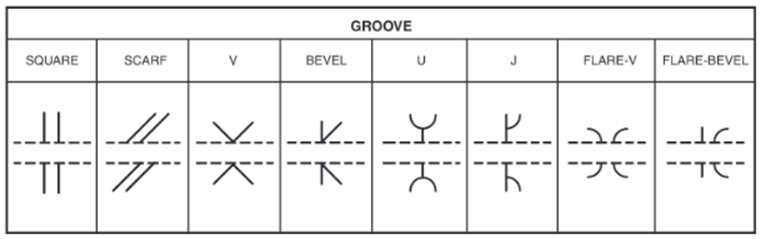
The above figure shows the different types of groove welds. The scarf groove weld is normally associated with brazing. All others are common in arc welding. As with fillet welds, the location of the weld symbol on the reference line (above or below) determines which side of the joint is to be welded.
The groove weld symbols mimic the geometry of the joint. Following the same principles as fillet weld symbols, when the symbol contains a perpendicular line it will always be to the left of the symbol. This applies to square, bevel, J-, and flare bevel groove welds. These welds, with the exception of the square groove weld, require preparation of one side of the joint. The side that needs preparation is indicated by the use of a broken arrow.
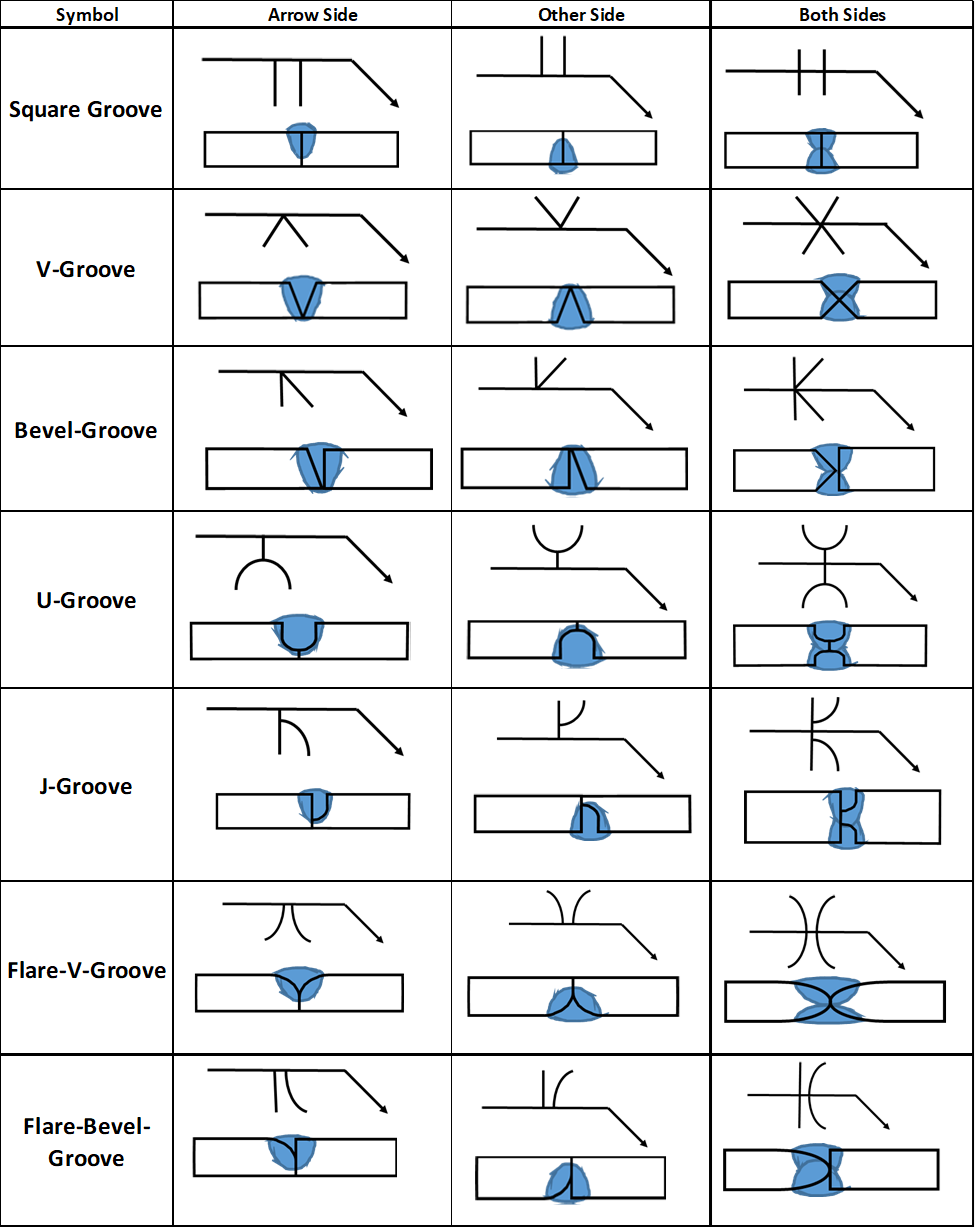
The image below illustrates the seven kinds of groove welds encountered in arc welding.
Broken Arrow
With the exception of square groove welds, all groove welds require some time of joint preparation. This may involve beveling one or both sides, machining one or both sides, or simply using the geometry of the parts being joined such as the case of a flared v-groove when welding two tubes together.
When only one side of the joint requires preparation the welding symbol must specify which side. This is accomplished by the use of a broken arrow. When the broken arrow is used the side that is prepared (beveled, machined, or other) is the side that the arrow points to.
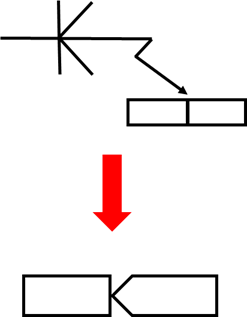
If a broken arrow is not used as in the image below then either side can be prepared.

When it is necessary to prepare a specific side the broken arrow must be employed. Again, the side to which the arrow is pointing is the one that will receive the preparation treatment.
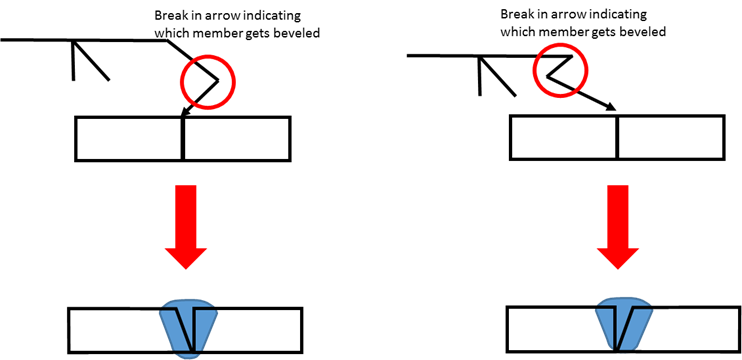
The side of the joint that must be prepared is the one to which the broken arrow points
This rule also applies to welds made from both sides.
Reference: Welding Symbols Training Manual