
In the January 2011 AWS publication of Inspection Trends, Albert J. Moore Jr. states that “other than the measuring tape, the fillet weld gage is the most used measuring device in the welding inspector’s kit.” We agree with this statement, but are also convinced that the fillet weld gage is THE most underused tool by people responsible for quality and welding operations. In our experience 98% of fillet gages are owned by CWIs and other inspectors, yet welders, supervisors and production managers should all be using them, as they are always conducting welding inspection. We also know that other than CWIs most people that owned these gages use them improperly.
There are several kinds of gages used in measuring welds and weld defects such as porosity, undercut, underfill, concavity, etc. The two most used and certainly our favorites are the Standard Fillet Weld Gage and the AWS Gage (Automatic Weld Size Gage). Below are instructions and graphics on how to use both.
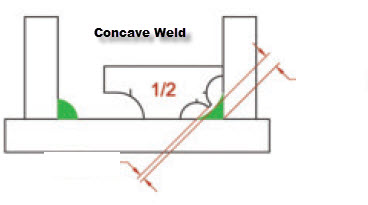
This Fillet Weld Gage![]() is on of the easiest to use and it is helpful to check for fillet size and concavity. We always want our welds to be flat to slightly convex. This gage will let you know if your weld is concave.
is on of the easiest to use and it is helpful to check for fillet size and concavity. We always want our welds to be flat to slightly convex. This gage will let you know if your weld is concave.
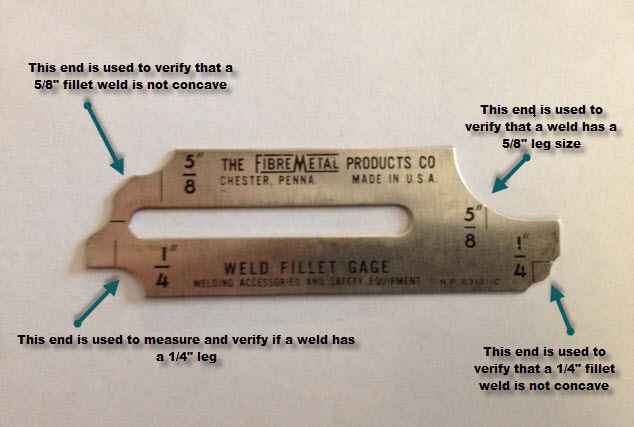
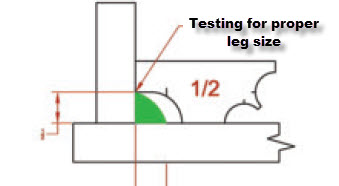
The illustrations above show you how to test a 1/2″ fillet. Slide the gage and have the top end rest against the vertical piece. This end should be exactly at the top edge of the weld to be a 1/2″ fillet. If there is space between the gage and the toe of the weld then the weld is undersized. The bottom edge of the fillet has more room. This is to allow for a larger leg size. This is sometimes useful with big fillet welds were gravity will tend to make the bottom leg larger. The vertical line will show where the bottom toe should be.
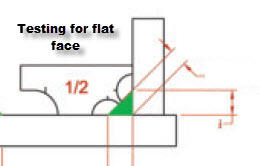
Once we have determined that our weld is properly sized at 1/2″ we test for concavity/convexity. As a general rule of thumb fillet welds should never be concave. The protrusion in the middle of the gage should make contact with the weld – this verifies that the weld is not concave. If there is daylight between the face of the weld and this end of the gage then our weld is concave and no longer an acceptable 1/2″ fillet.
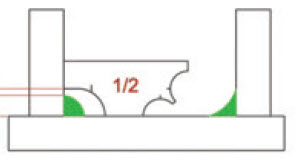
Below are examples of welds that were supposed to be 1/2″ but ended up being undersized and convex.
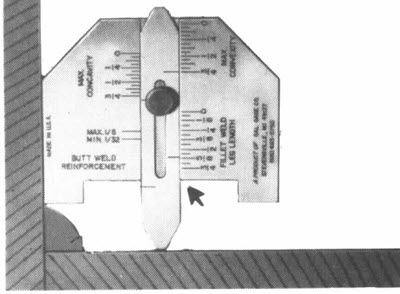
This gage is more versatile than the Standard Fillet Gage. Below is all it can measure:
1. Size of a fillet weld – place gage against the toe of the weld and slide the pointer down towards the bottom piece of the structure being welded. The size of the fillet weld will be indicated by the gage.
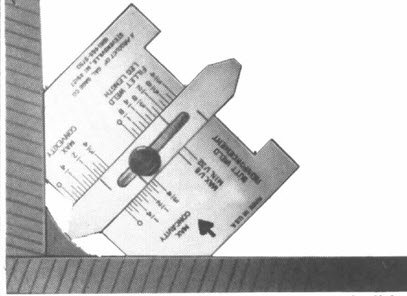
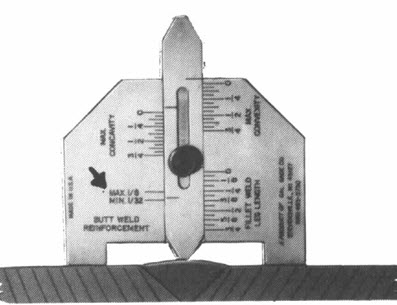
2. Permissible tolerance of convexity – Using the end of the gage that has the 45-degree angle sides bring the gage until it touches both pieces being welded. Once again, slide the pointer down, this time until it touches the face of the weld. The gage will indicate if there is too much reinforcement.

3. Permissible tolerance of concavity and underfill – Doing the same as when checking for permissible convexity the gage will indicate if there is a concave weld.
4. Permissible tolerance of reinforcement – Butt weld will sometimes have a specified maximum reinforcement allowed. Placing the gage as shown above you will be able to measure reinforcement on a butt weld.
There are other gages that can also measure undercut, misalignment, amount of porosity, and angle of preparation.
Do you have a preferred gage? If not, are you considering one of the above or some other one?